Export For Unreal Engine
Choose Unreal export, with Livelink in CalibFX Lens:

While the file is the same, the engine configuration varies slightly between Unreal 5.6 or below and Unreal 5.7 or later.
Unreal Engine 5.7 or later
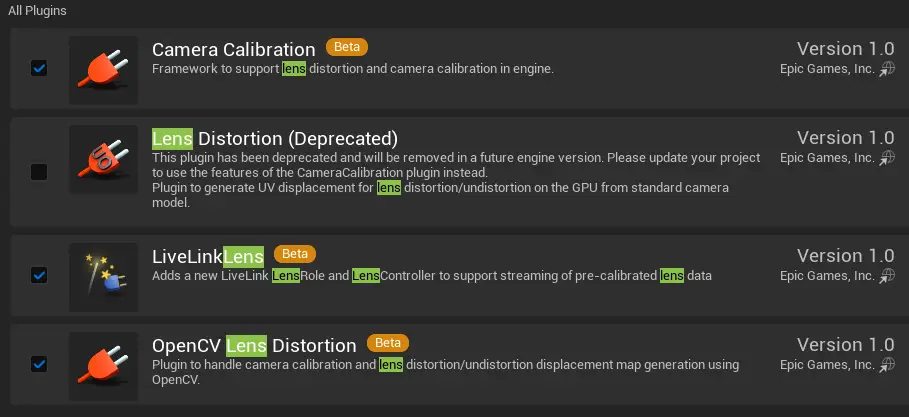
Required Plugins
In unreal, make sure you have the following plugins enabled:
- Composure
- LiveLinkFreeD
- LiveLinkCamera
- Camera Calibration
- Timed Data Monitor


Restart the editor after enabling the plugins.
Minimal Tracking Setup
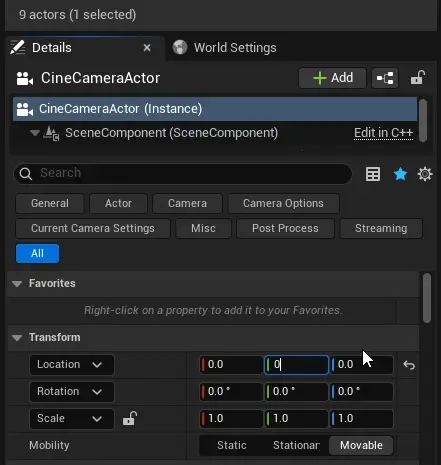
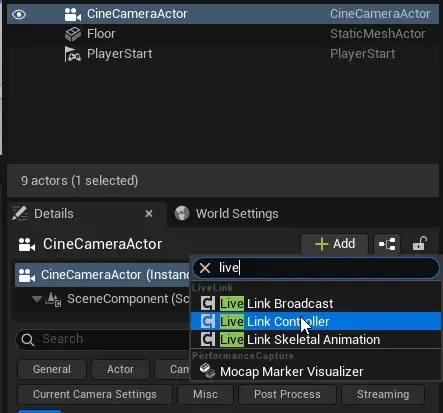
Add a CineCameraActor to your scene and create a Livelink Freed source:

Make sure the camera transforms are all zeros so the pose is consistent with the tracking referential:
In the livelink input, make sure the min and max for each axis are the same as in the lens file. By default Unreal will detect the minimum and maximum as you move the encoders, but it is safer to set these values manually:
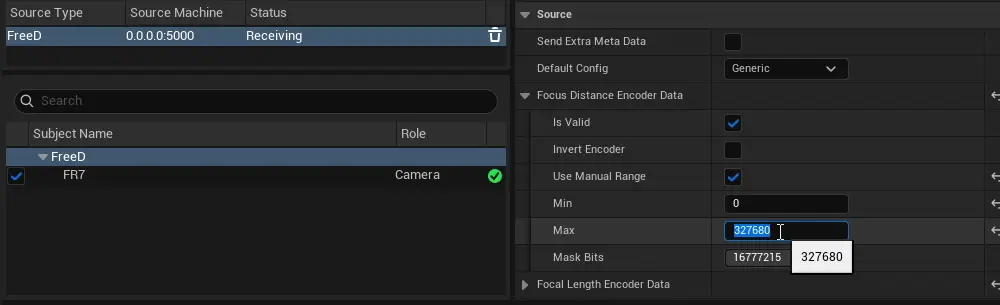
Note
There is a Mask Bits field. This is useful to get Iris data from FreeD.
The value you have to put in Unreal is the same as the one you used in CalibFX Lens while doing the calibration:
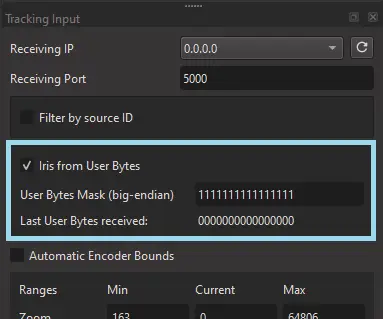
Although you will have to convert manually from big-endian binary representation to unsigned integer representation.
Save the current LiveLink configuration as a preset:
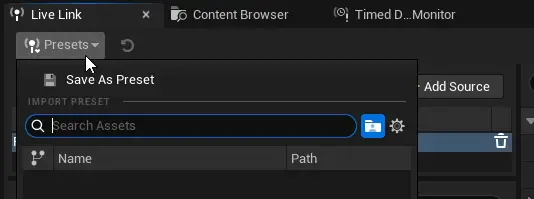
Open the Project Settings and set the Default Livelink Preset to what you just saved:
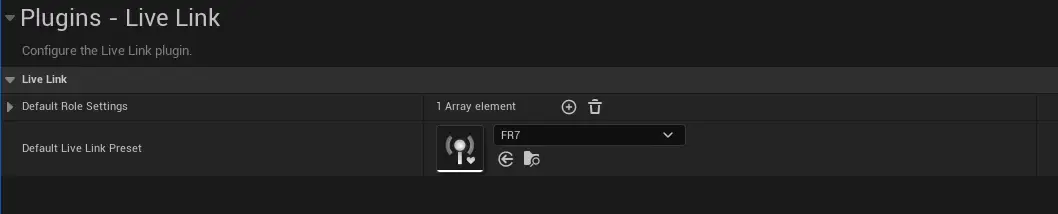
This will allow the configuration to be automatically reloaded on engine restart.
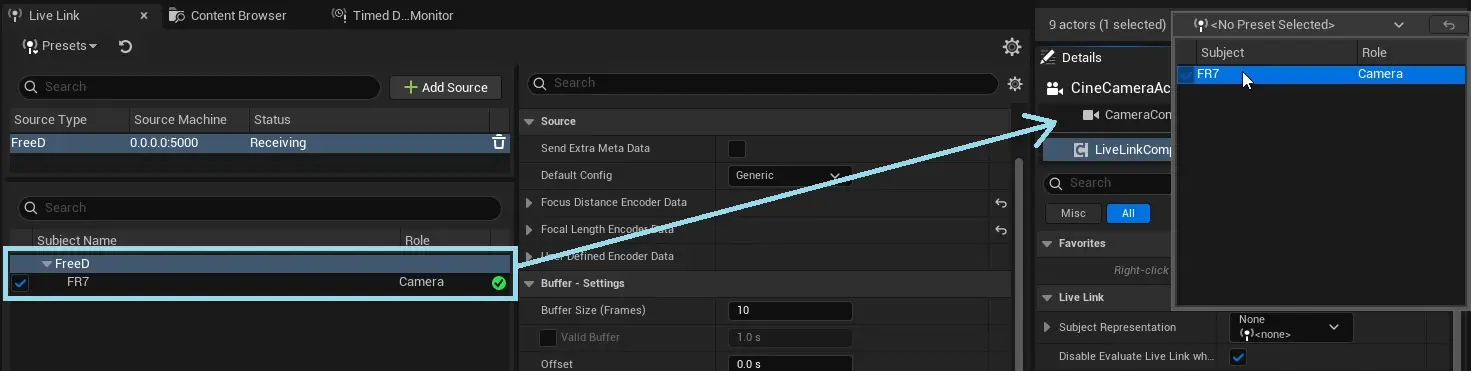
Add a LiveLink Controller component to the CineCamera:
Select the FreeD Source in Subject Representation:
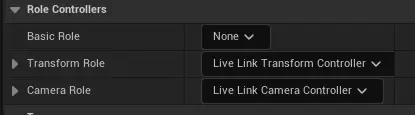
Make sure there are a Transform Role and a Camera Role:
Now the camera should move spatially according to the tracking input.
Lens File Setup
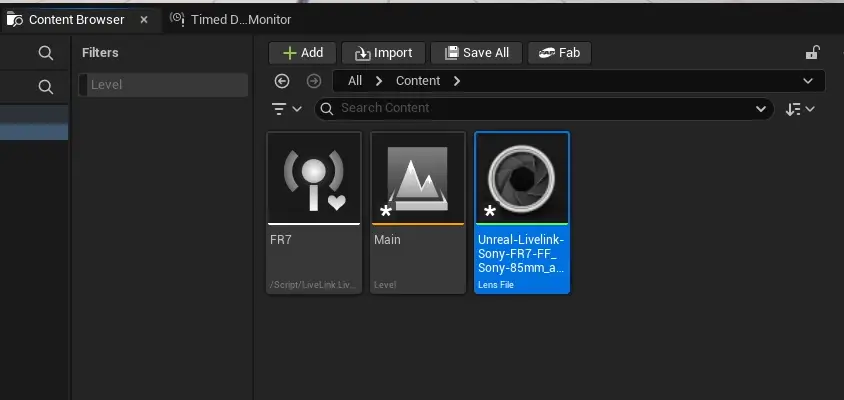
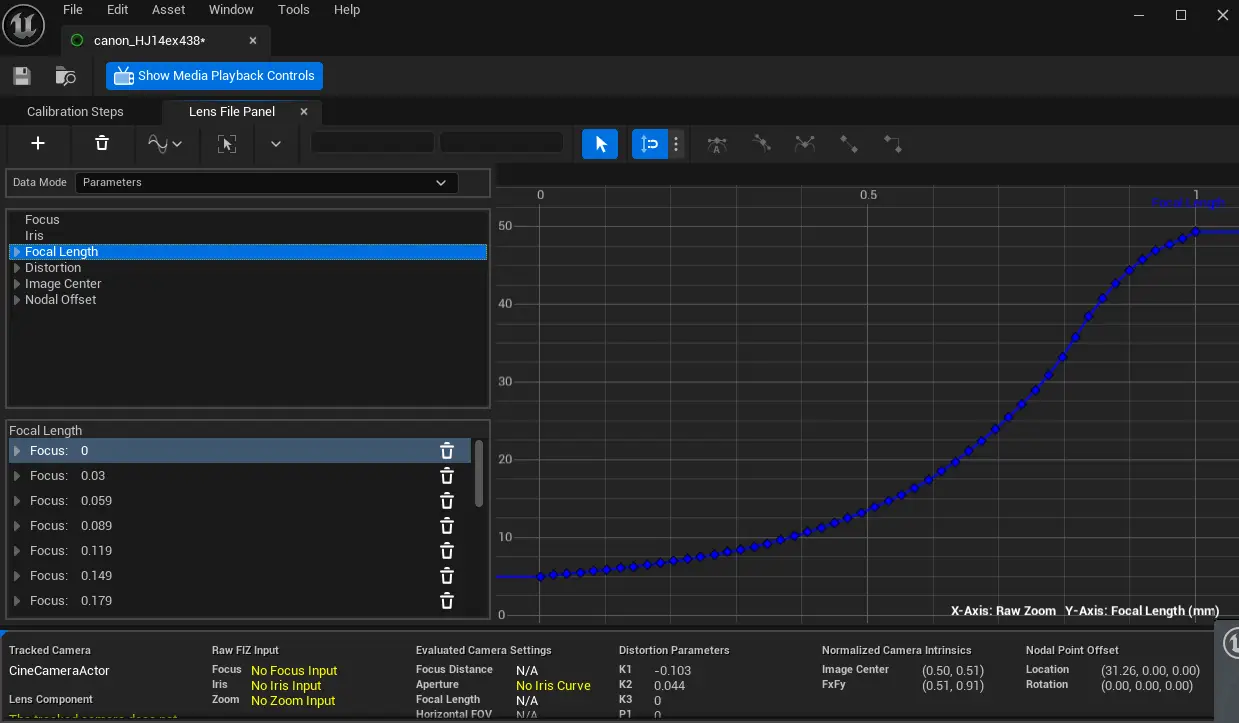
Drag and drop the .ulens file in the content browser. A Lens File asset should appear:
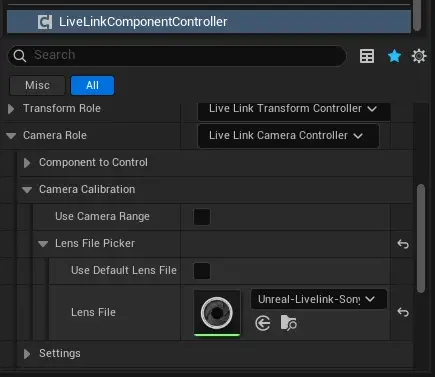
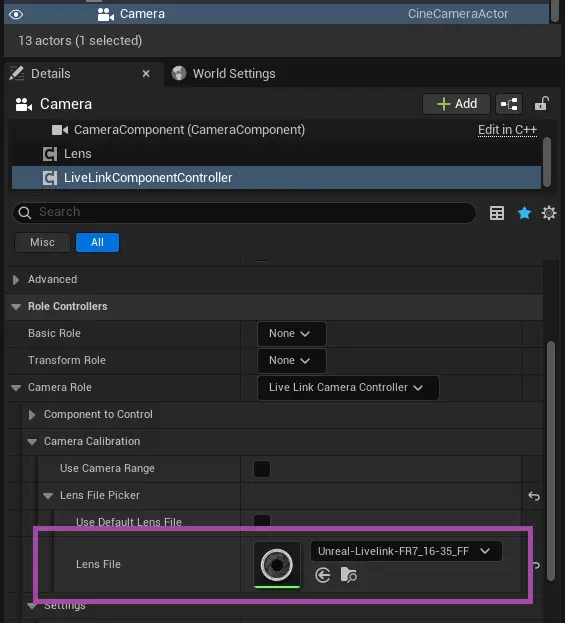
In the LiveLinkComponentController of the camera, navigate to Camera Role -> Camera Calibration -> Lens File Picker and select the newly imported lens file:
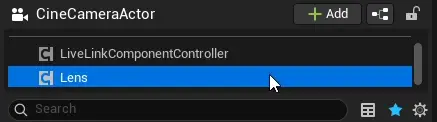
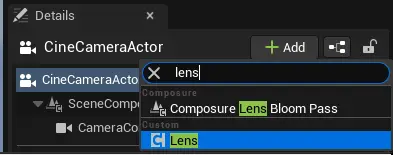
Add a Lens component in the camera actor:
Drop the lens file in the Lens File field of the lens component:
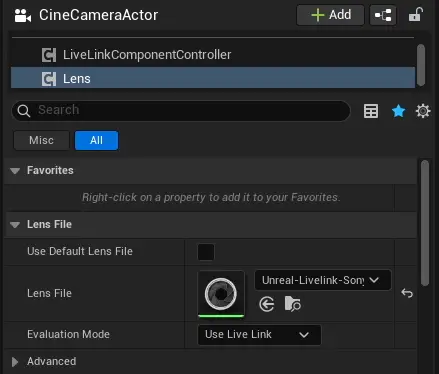
Make sure the Evaluation Mode is "Use Live Link".
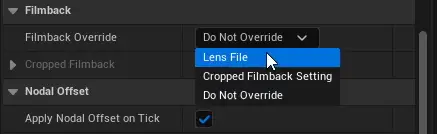
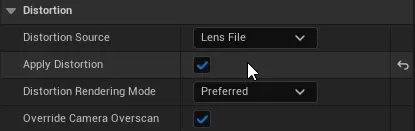
Further down, select Filmback Override : Lens File, check Apply Nodal Offset on Tick and check Apply Distortion:
Now you should see the Focal Length, Focus Distance, Distortion coefficients, Front Offset and eventually Aperture move on the camera actor as you turn the rings on the real lens.
Warning
For Nodal Offset to be applied correctly, you need the camera's live link controller to have a Tranform Role. Some advanced setups separate the Tracking Role and the Camera Role. In this case you need to use a blueprint asset to apply the nodal offset.
Unreal Engine 5.6 and below
In unreal, make sure you have the following plugins enabled:
- Camera Calibration
- LiveLinkLens
- OpenCV Lens Distortion
Drag and drop the .ulens file in the content browser.

If you double-click on the lens uasset, this window will appear with all the curves already filled in:
Warning
The camera must receive the lens tracking through a Livelink component, like when using the Livelink FreeD plugin.
Add a "Lens" component in the Cine Camera Actor:
You can now drag and drop the lens asset in the "Lens File" slot. In addition to this, you need to activate "Apply Distortion" and override the filmback with that of the lens file, as shown below:

Also put the lens file in the "Camera Role" section of the camera's LivelinkComponentController:
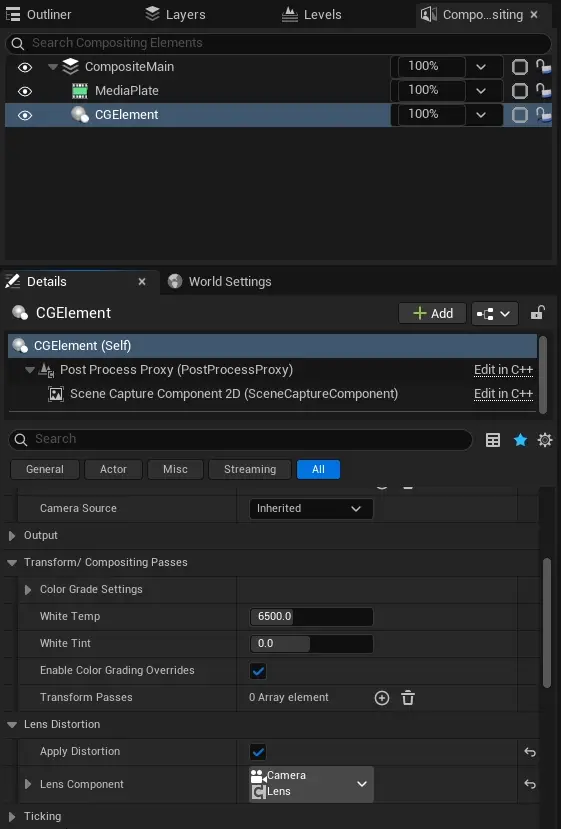
If using the Composure plugin, make sure to tick "Apply Distortion" in the CG Element:
Warning
For Nodal Offset to be applied correctly, you need the camera's live link controller to have a Tranform Role. Some advanced setups separate the Tracking Role and the Camera Role. In this case you need to use a blueprint asset to apply the nodal offset.