Export For Pixotope
Choose Pixotope export in CalibFX Lens:

Preliminary steps
Start a Pixotope Show:
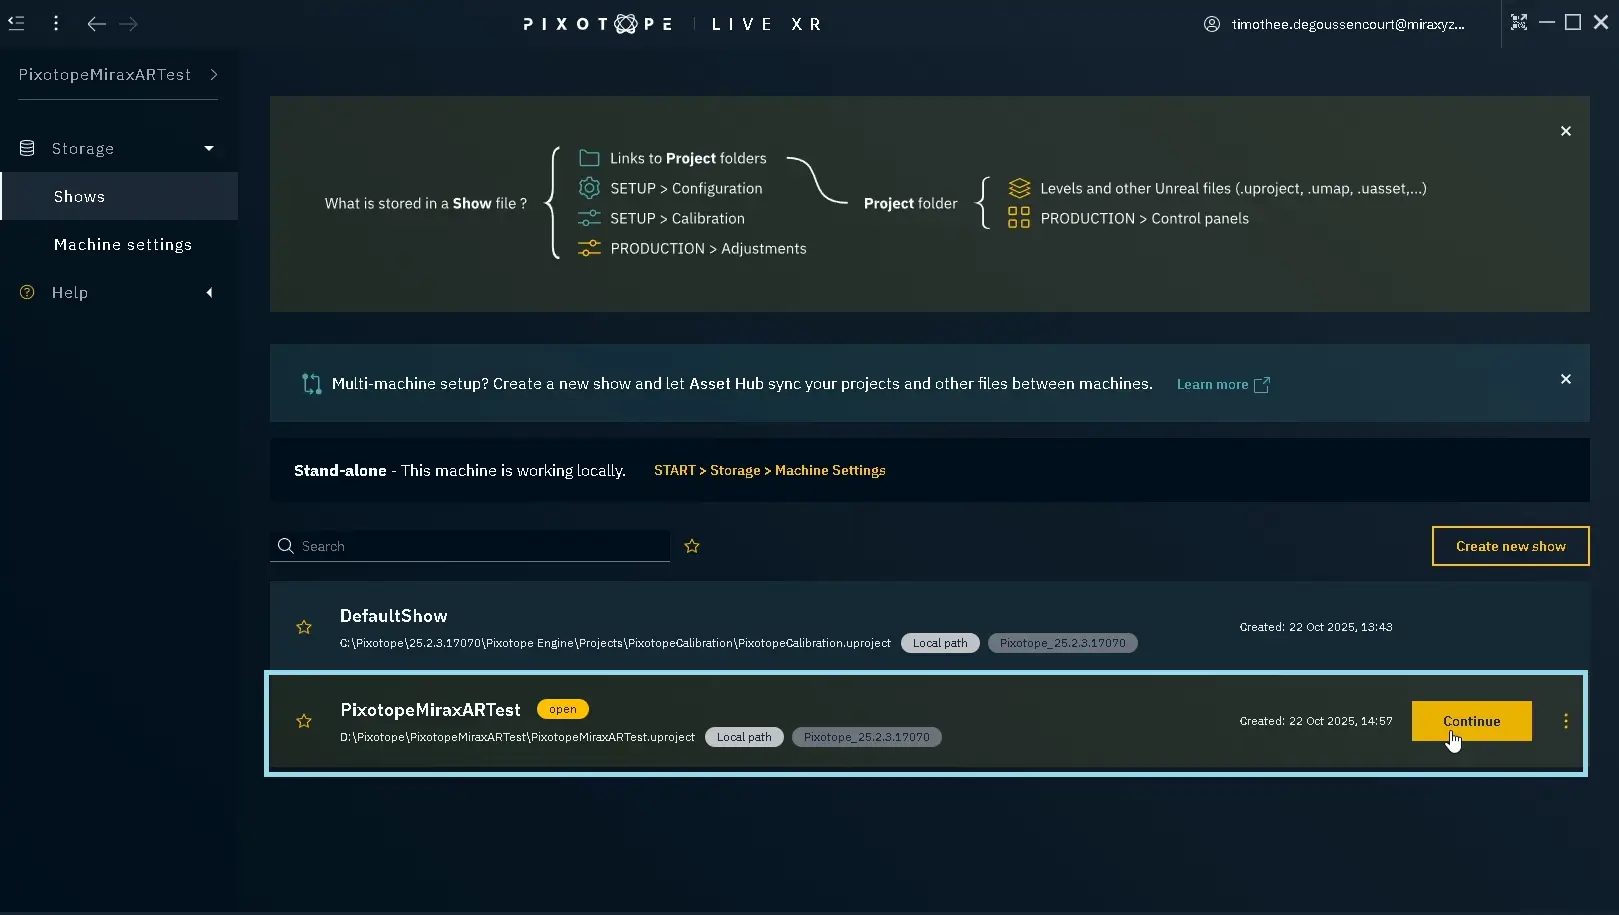
Go to Show->Launch and press Launch LIVE:

Set up Tracking
Go to Configure->Camera Tracking. If there is no existing camera, press Add camera system:
![]()
Name it as you wish and press Confirm:
![]()
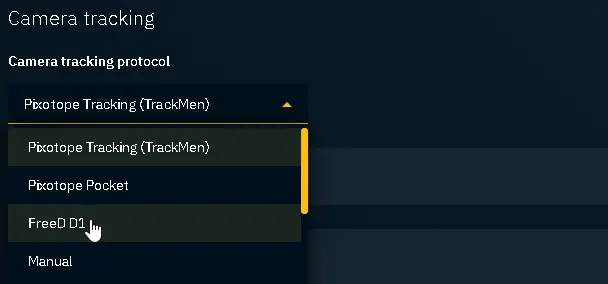
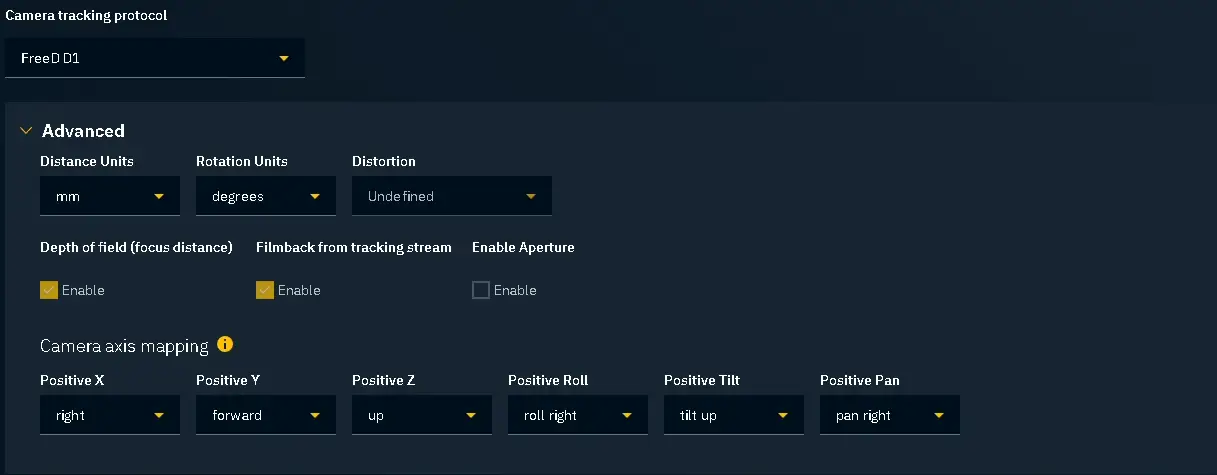
Scroll down and choose the protocol. Usually you would use "FreeD D1":
Load Lens File
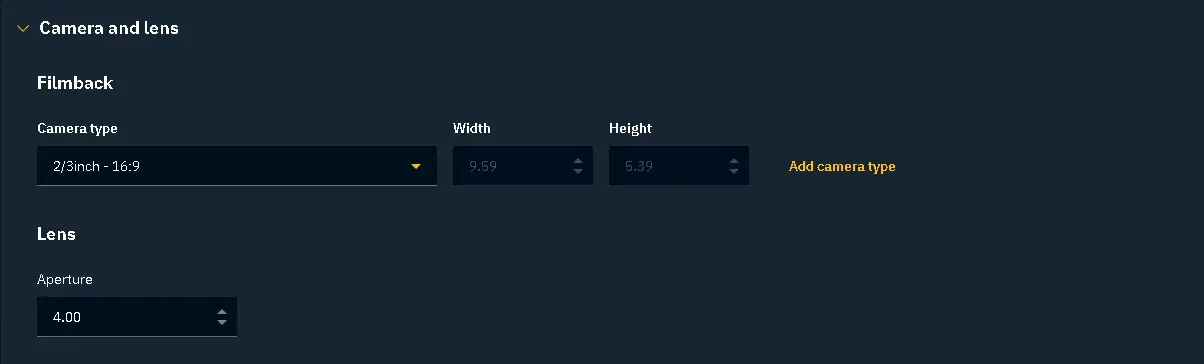
In the Configure->Camera Tracking tab, set the filmback characteristics of your camera. Make sure the sensor width and height correspond to the values you put in CalibFX Lens when exporting the lens file:
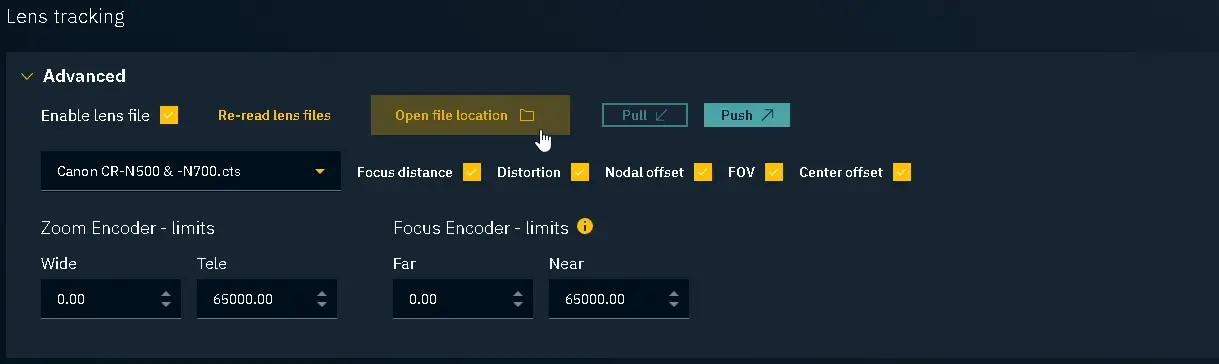
Scroll down to Lens tracking. Check Enable lens file and press Open file location:
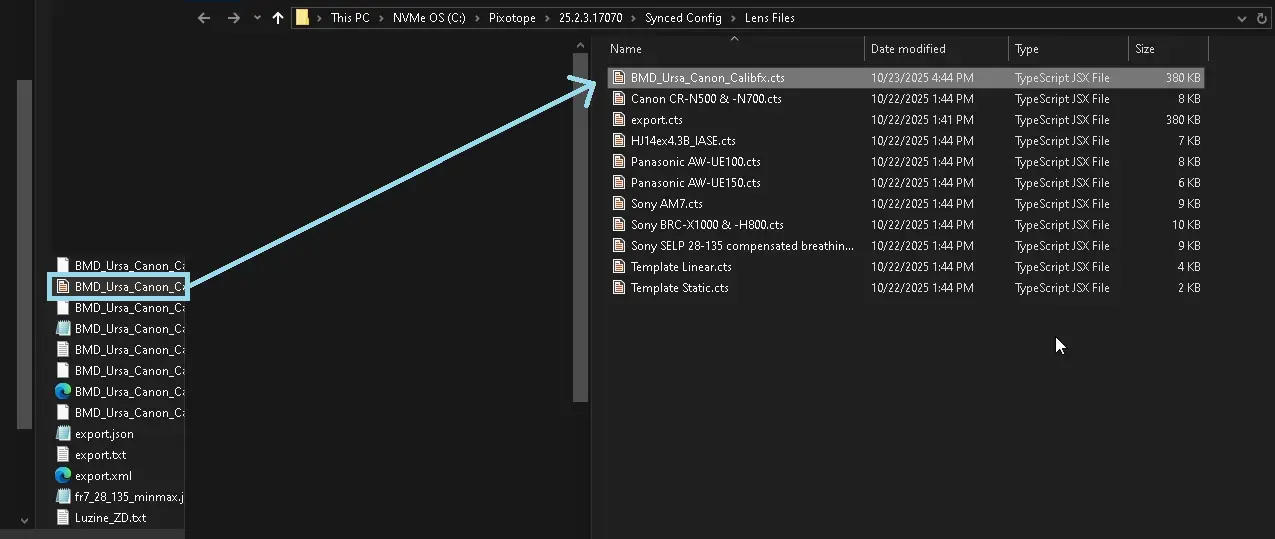
This will open an explorer window in "C:\Pixotope\[version]\Synced Config\Lens Files". Copy your .CTS lens file there:
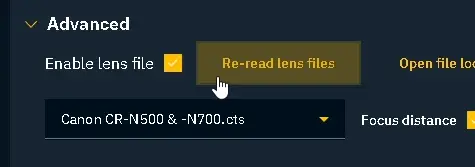
Afterward, come back to Pixotope and press Re-read lens files to update the list:
Select your lens from the drop-down list:
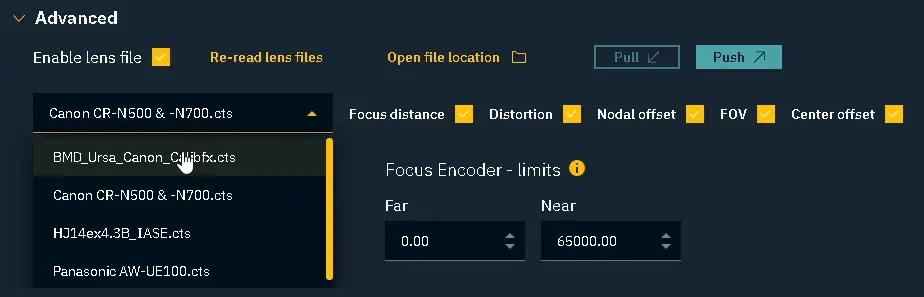
Finally, don't forget to set the encoder bounds to match those of your tracking system. The Zoom Encoder - limits and Focus Encoder - limits should usually be the same as in CalibFX Lens when the calibration was done:

Finish configuring I/O
Go to Configure->Routing
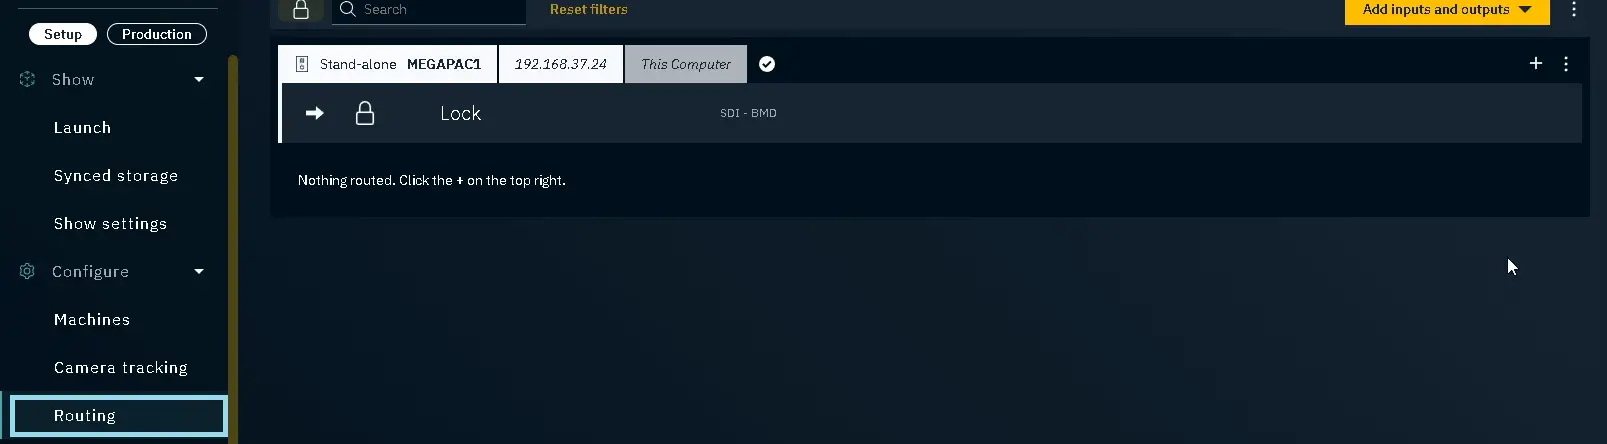
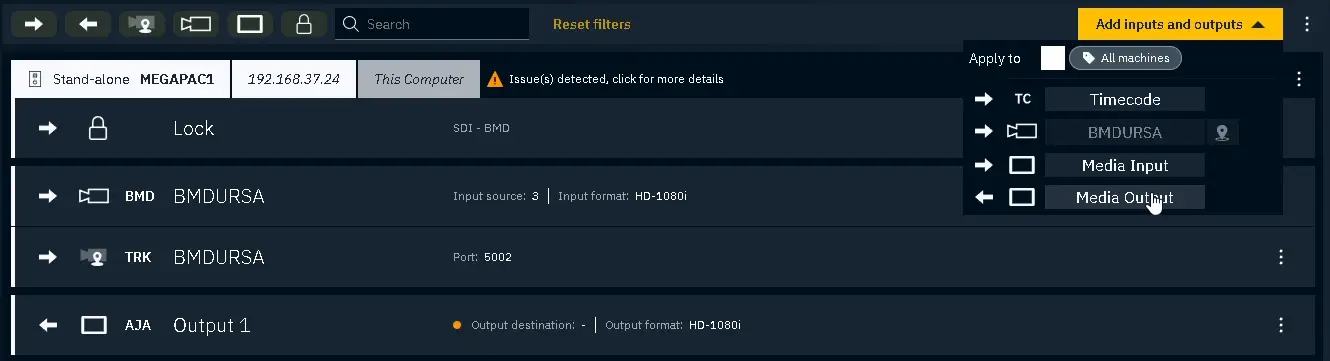
Press Add inputs and outputs and select the camera tracking device from earlier:

A video input and a tracking source will appear:

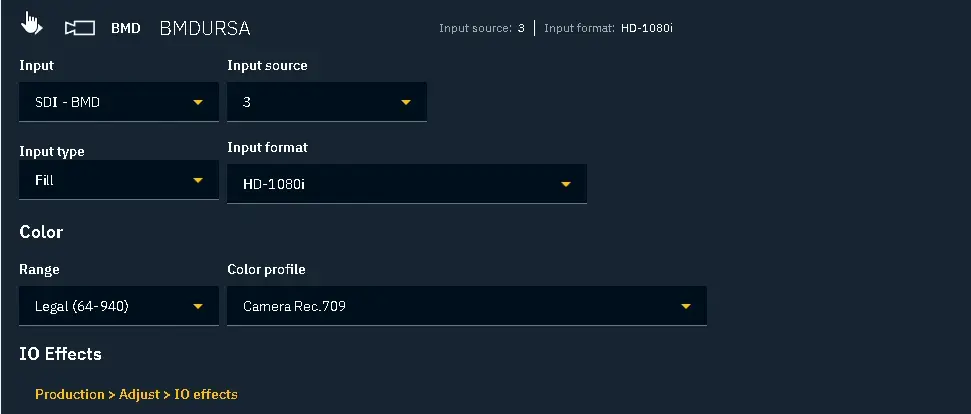
Configure the video input according to your setup (here we had a Blackmagic video card instead of the default Aja):
Open the tracking configuration and set the correct IP and Port for the receiver:
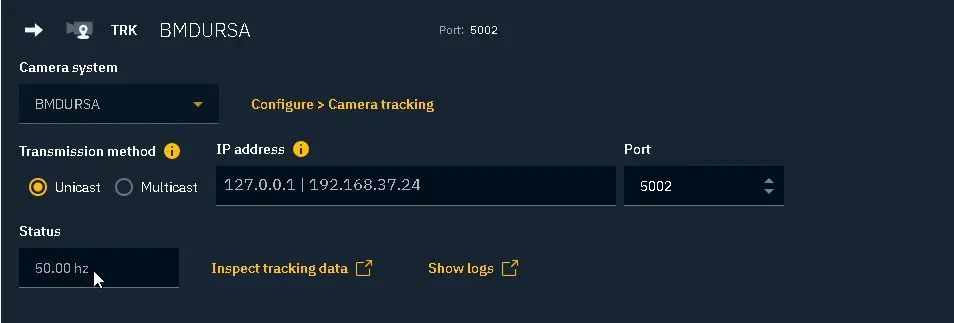
Once they are correct, the Status frequency should display roughly the same frequency as the genlock, and more importantly not zero.
You can set up the video output similarly to the video input and voilà: