RigFX Configuration
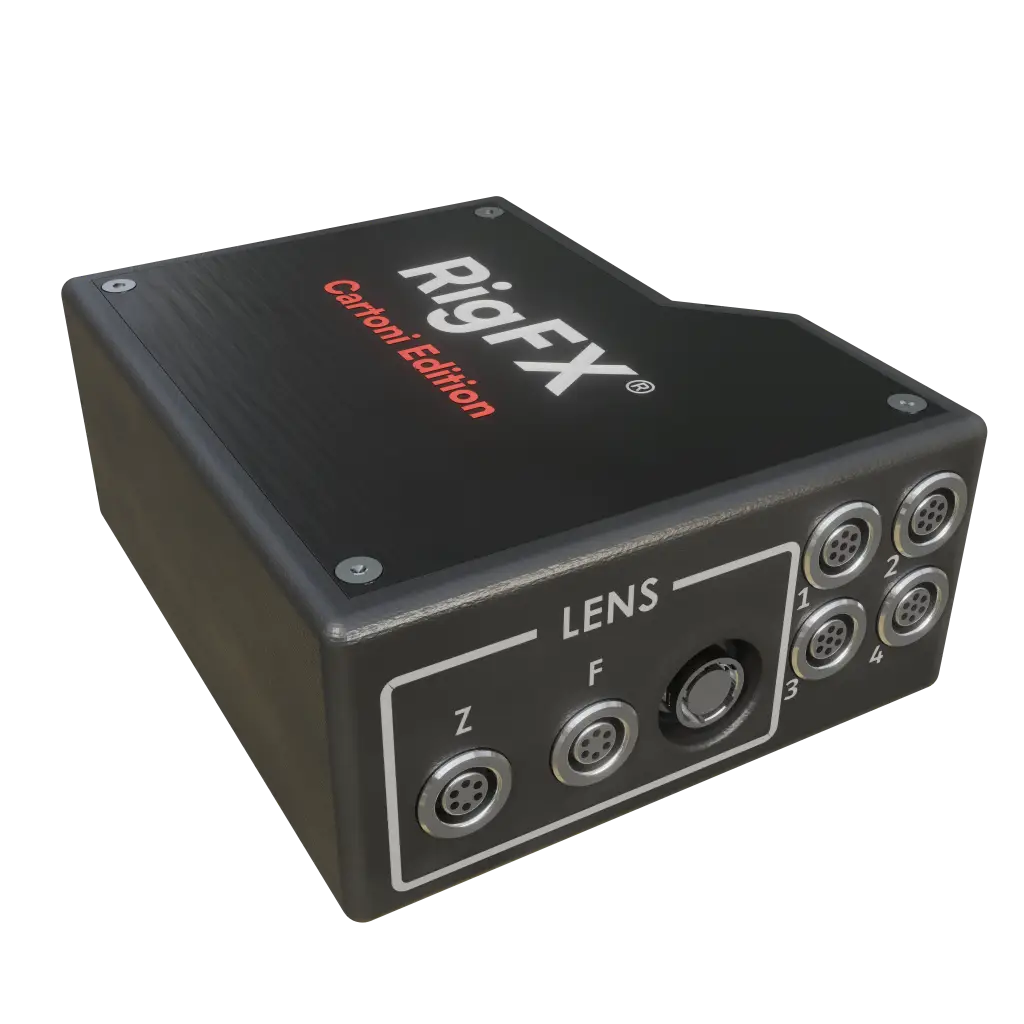
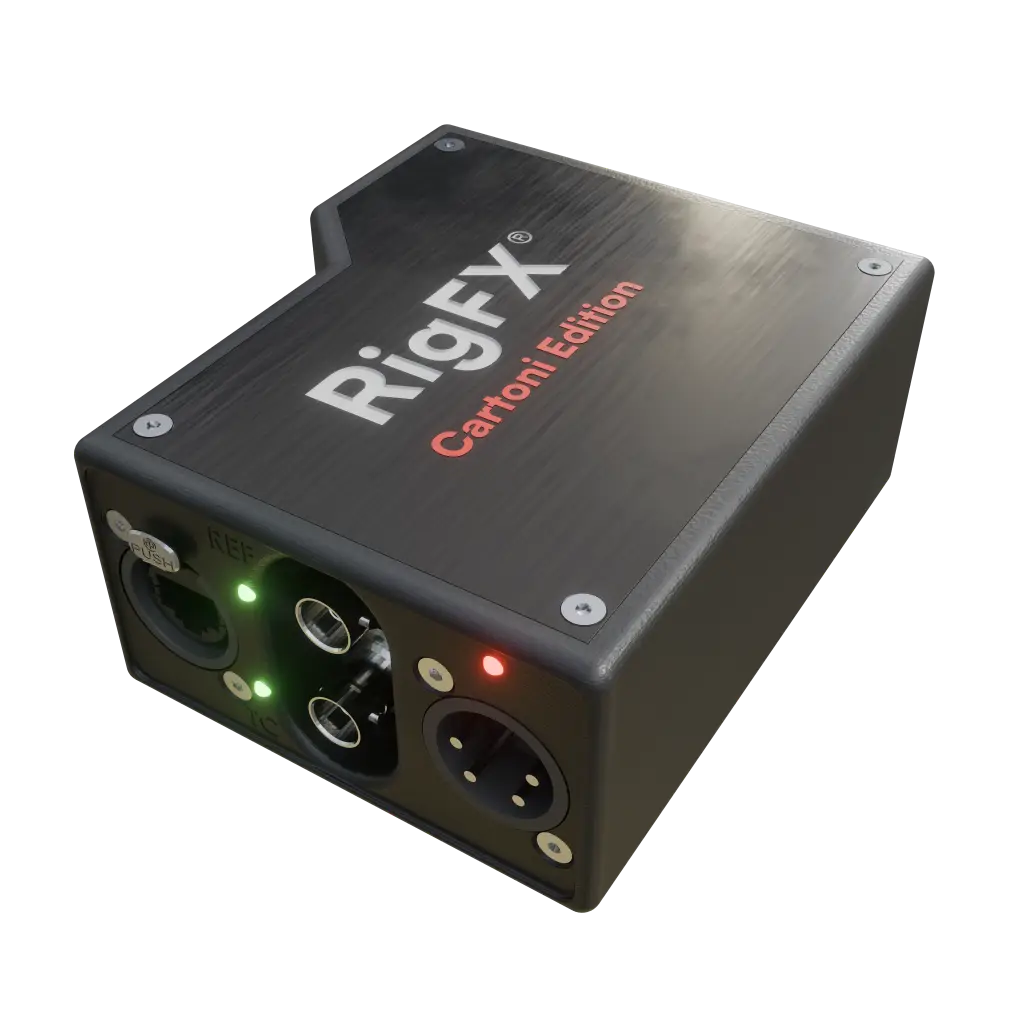
1. Connection
- plug genlock into Ref
- plug network cable
- plug power
2. Network
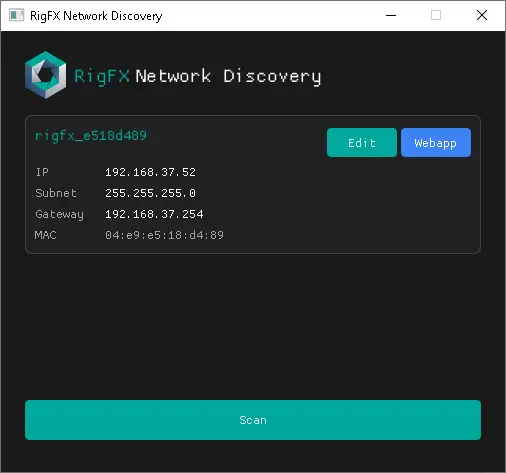
Use the RigFX discovery tool to discover RigFX on the network and assign an ip that fit your network infrastructure.
You can access RigFX webapp by clicking on webapp button or using the ip address in any browser like Chrome.
http://XX.XX.XX.XX (replace XX with your current ip address).
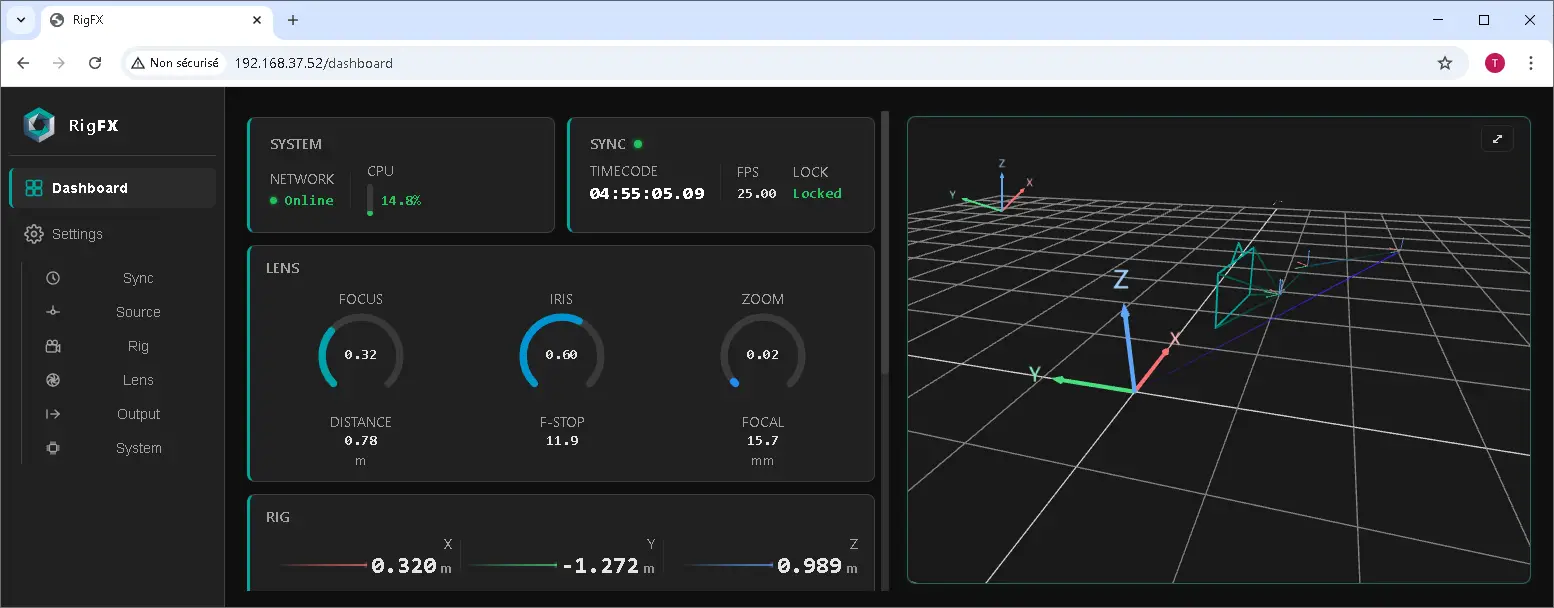
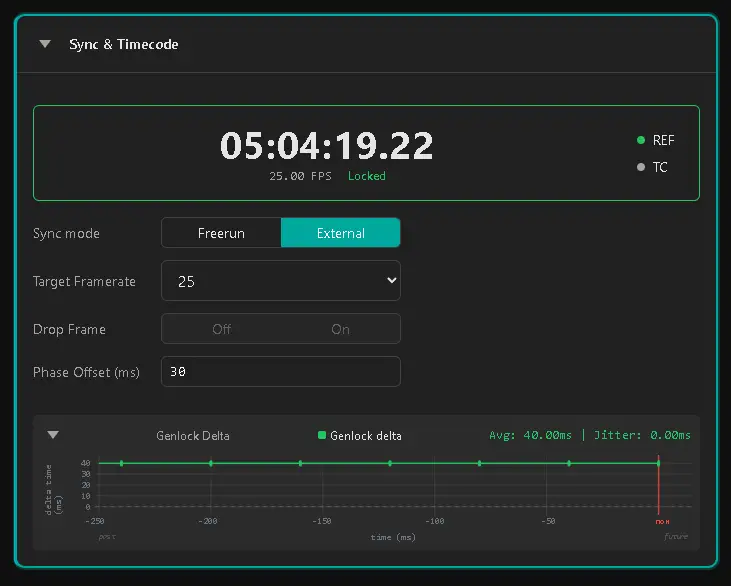
3. Sync
physically:
- plug a genlock to rigFX in the ref port
On RigFX go to:
- settings / Sync
- sync mode: set External
- target FrameRate: set the expected framerate
- you should check the displayed FPS below timecode is the one you set, and the status has to be locked
- a graph below display genlock pulse arrival time
4. Cartoni Source
physically:
- plug Pan of the arm to channel 1
- plug Tilt of the arm to channel 2
- set the arm direction where you wan to have Pan to be zero.
- We recommend to use a direction easy to remember, like parallel to the main direction of the studio (etc…)
- level the arm to be perfectly horizontal. (see chapter below)
- lock the arm in this position
On RigFX go to:
- settings / Source / Cartoni
- enable Channel 1 and 2 only
- click “Set 0” for Channel 1 and Channel 2
- the “Set 0” button wil automatically compute the offset to add to the Cartoni sensors in order to output zero at this very precise position
Success
Then you can unlock the arm, it has been calibrated !
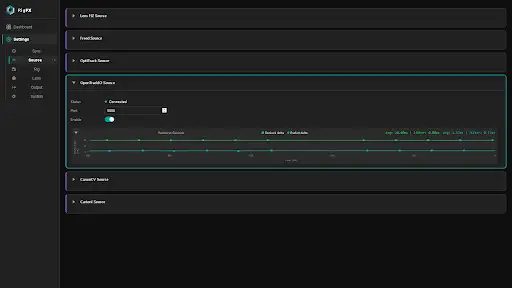
5. OpenTrackIO Source
On FR7 webapp:
- target RigFX ip adress for OpenTrackIO
On RigFX:
- go to Settings / Source / OpenTrackIO
- set the reception port
- enable the source
- On the graph below source you should see incoming packet
- if the two lines are on top of each other, set some Phase Offset in Settings / Sync to differentiate the two
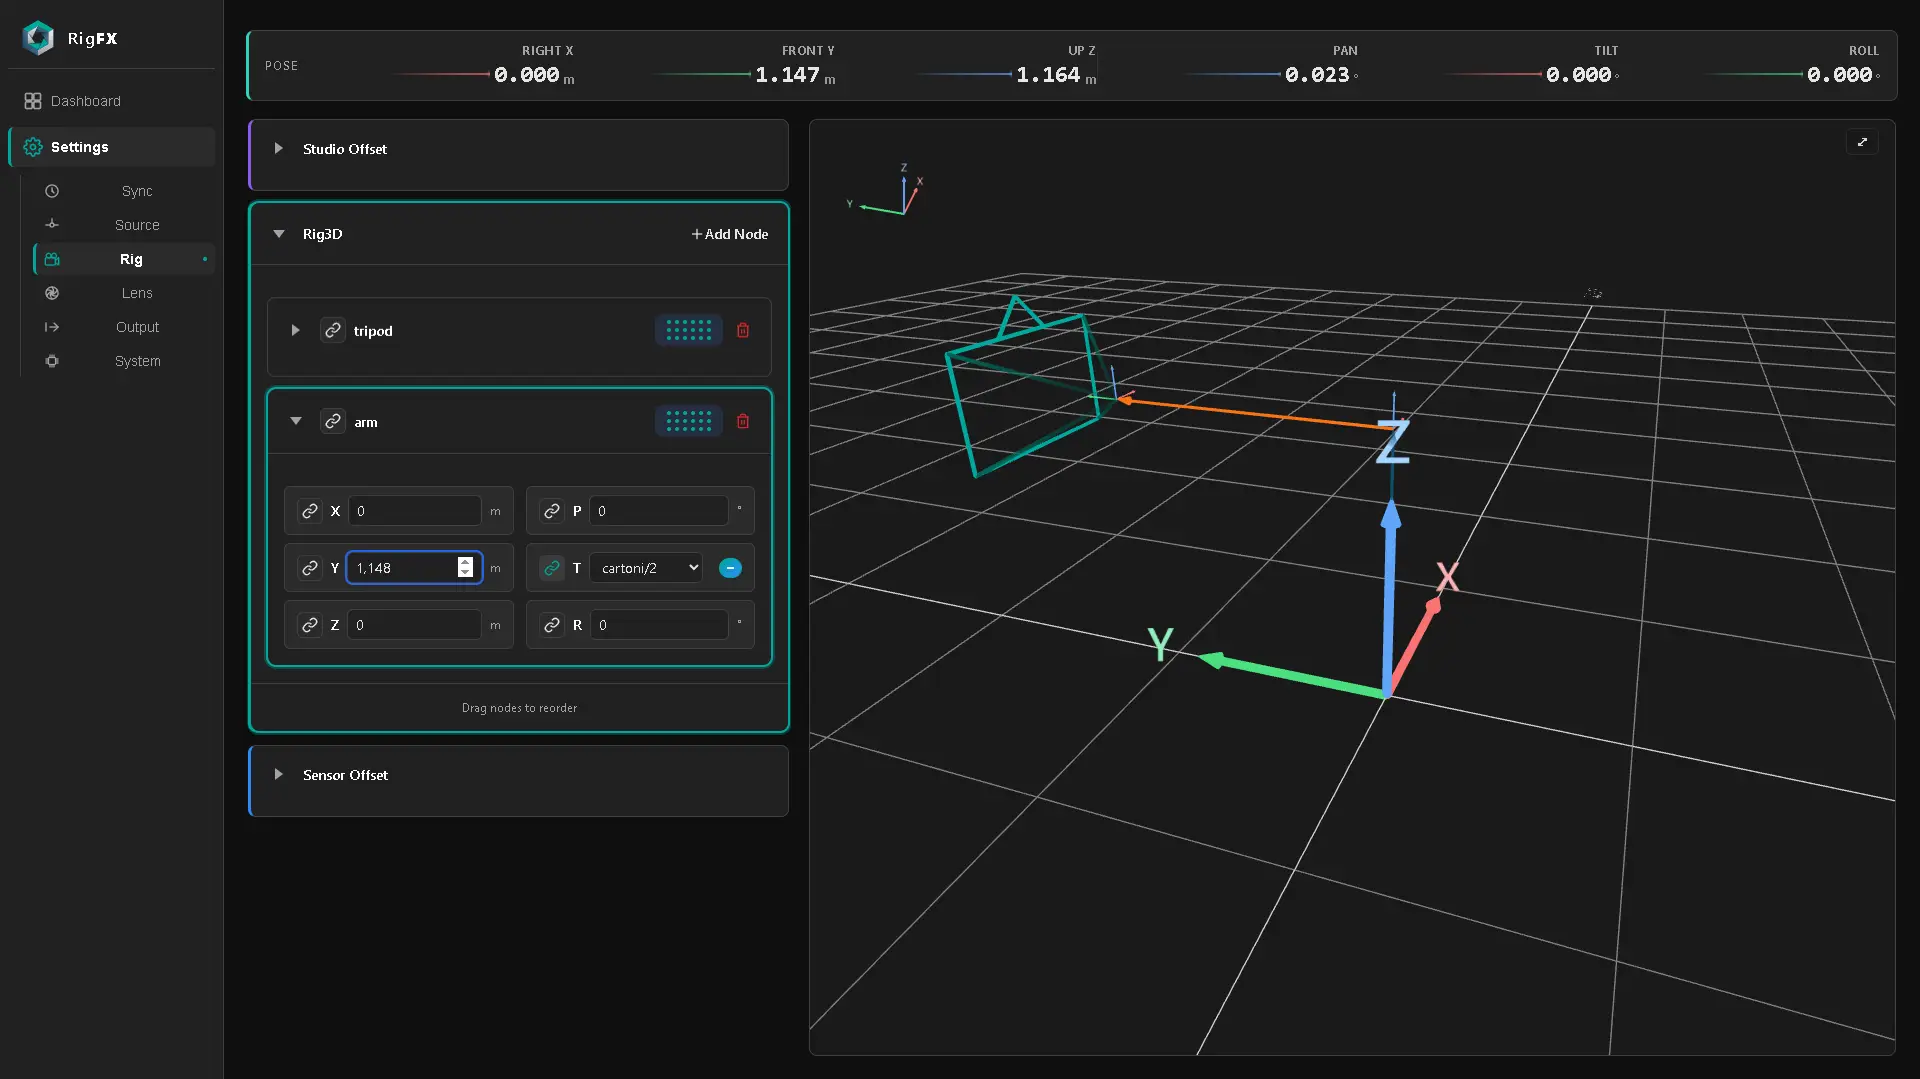
6. Rig
On RigFX
- go to Settings / Rig
- add a first node named “tripod”
- set the height A from the floor to arm pivot point into Z, a positive value as you go up
- bind the pan to cartoni channel 1
Warning
probably set negative sign depending of the encoder mounting
- bind the tilt to cartoni channel 2
Warning
probably set negative sign depending of the encoder mounting
- add a node named “arm”:
- set the length B of arm in Y, a positive value as you go front.
- bind the tilt to cartoni channel 2 (set the opposite sign compared to the one assigned in node “tripod”)
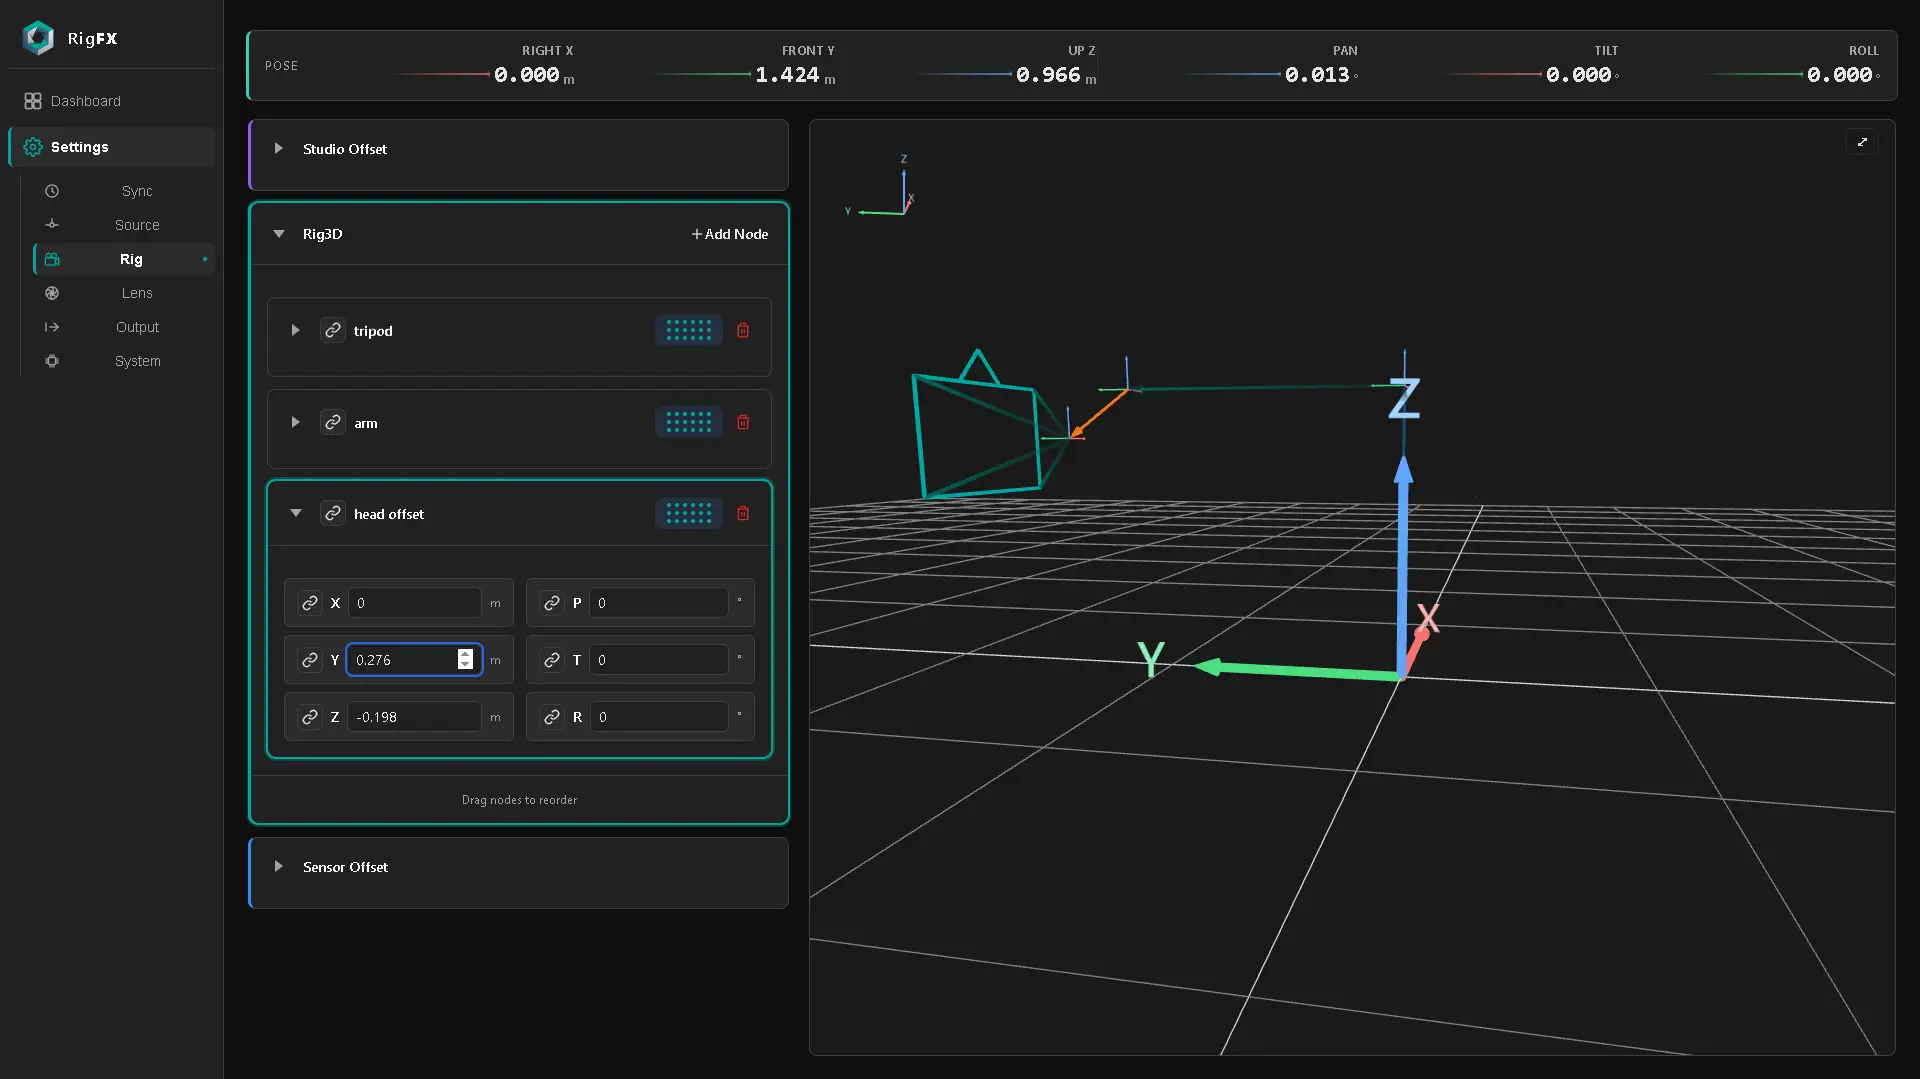
- add a node named ‘head offset”
- measure the offset in front C and height D from pivot point at the end of the arm to the pivot point of the PTZ
- front value in Y (positive)
- height value in Z (negative as you go down)
Note
you can also measure distance to a specific point of the PTZ body and use exact distance to pivot point reported by manufacturer (can be easier)
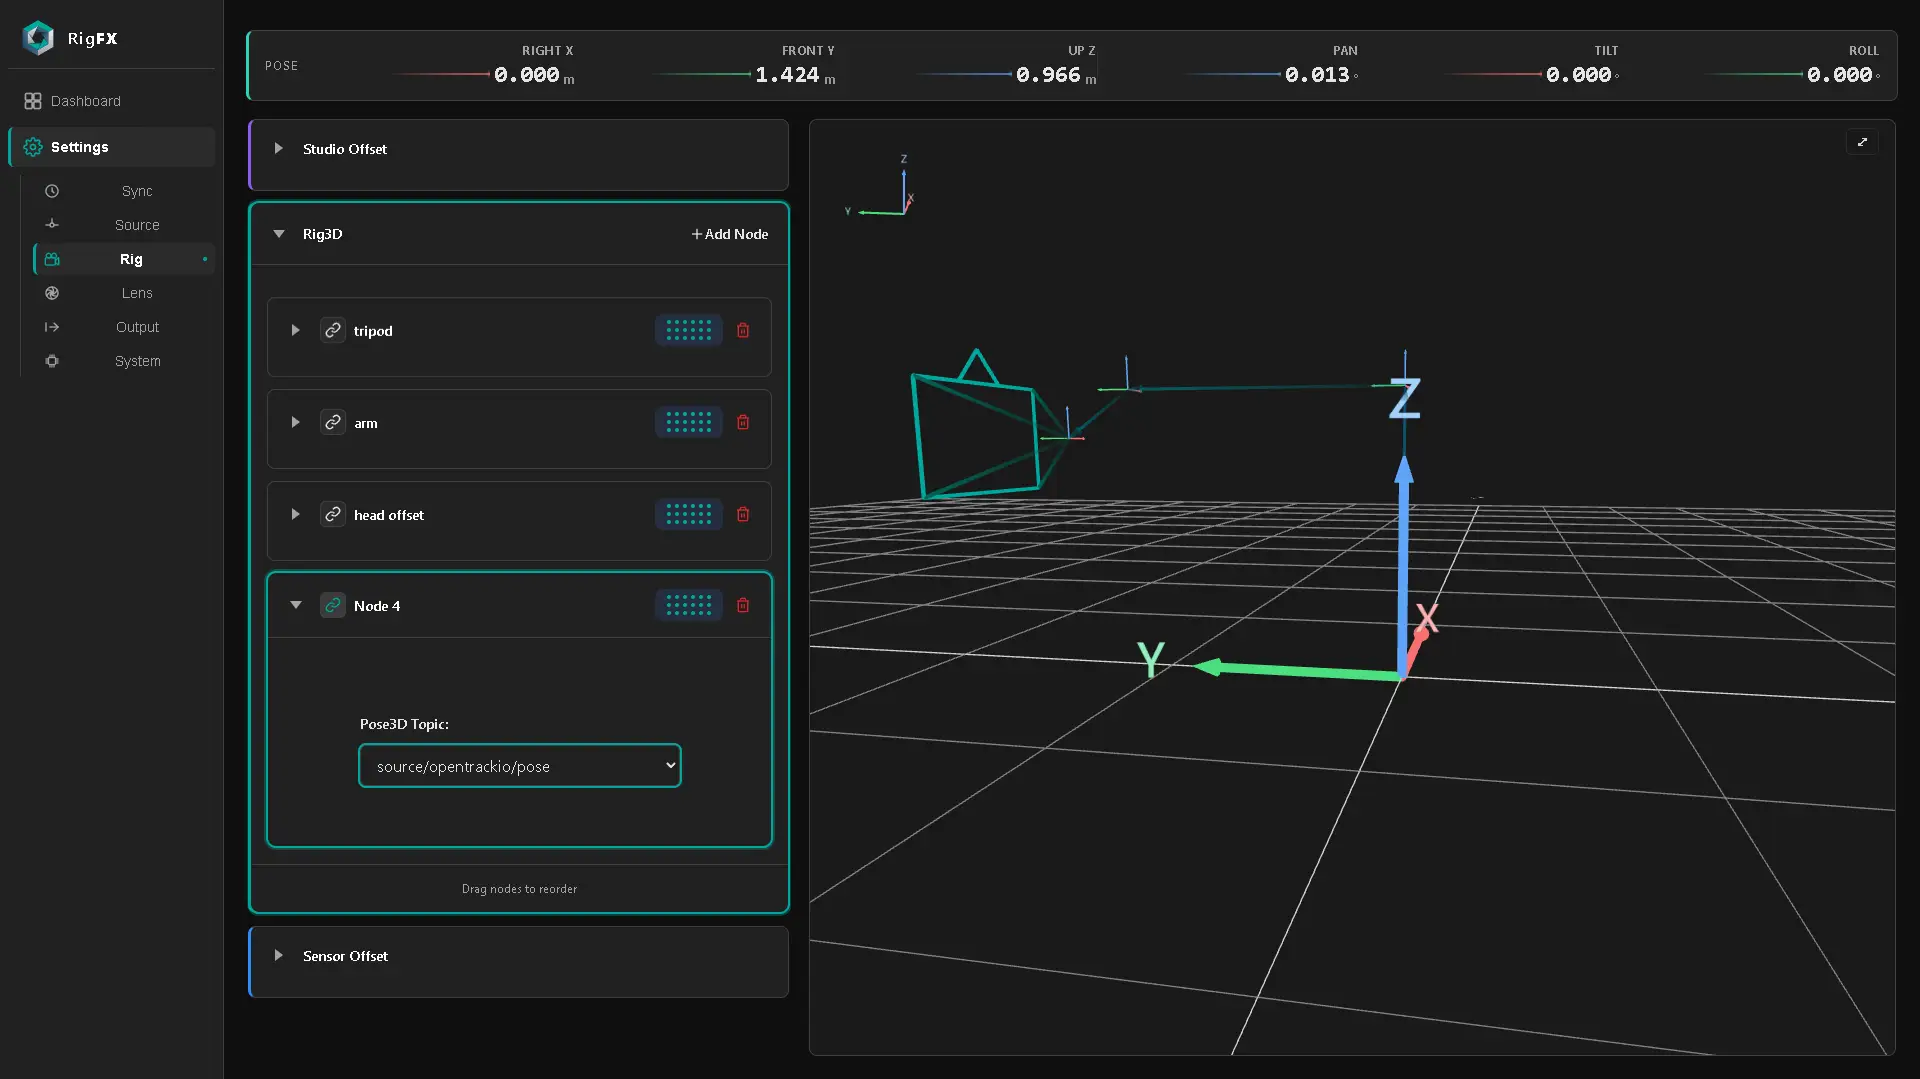
- add a node named ‘fr7”
- bind the full node to source opentrackio transform
Success
You are done !
For now studio offset and sensor offset are set to zero.
It will be filled thanks to Lineup tool.
Tripod
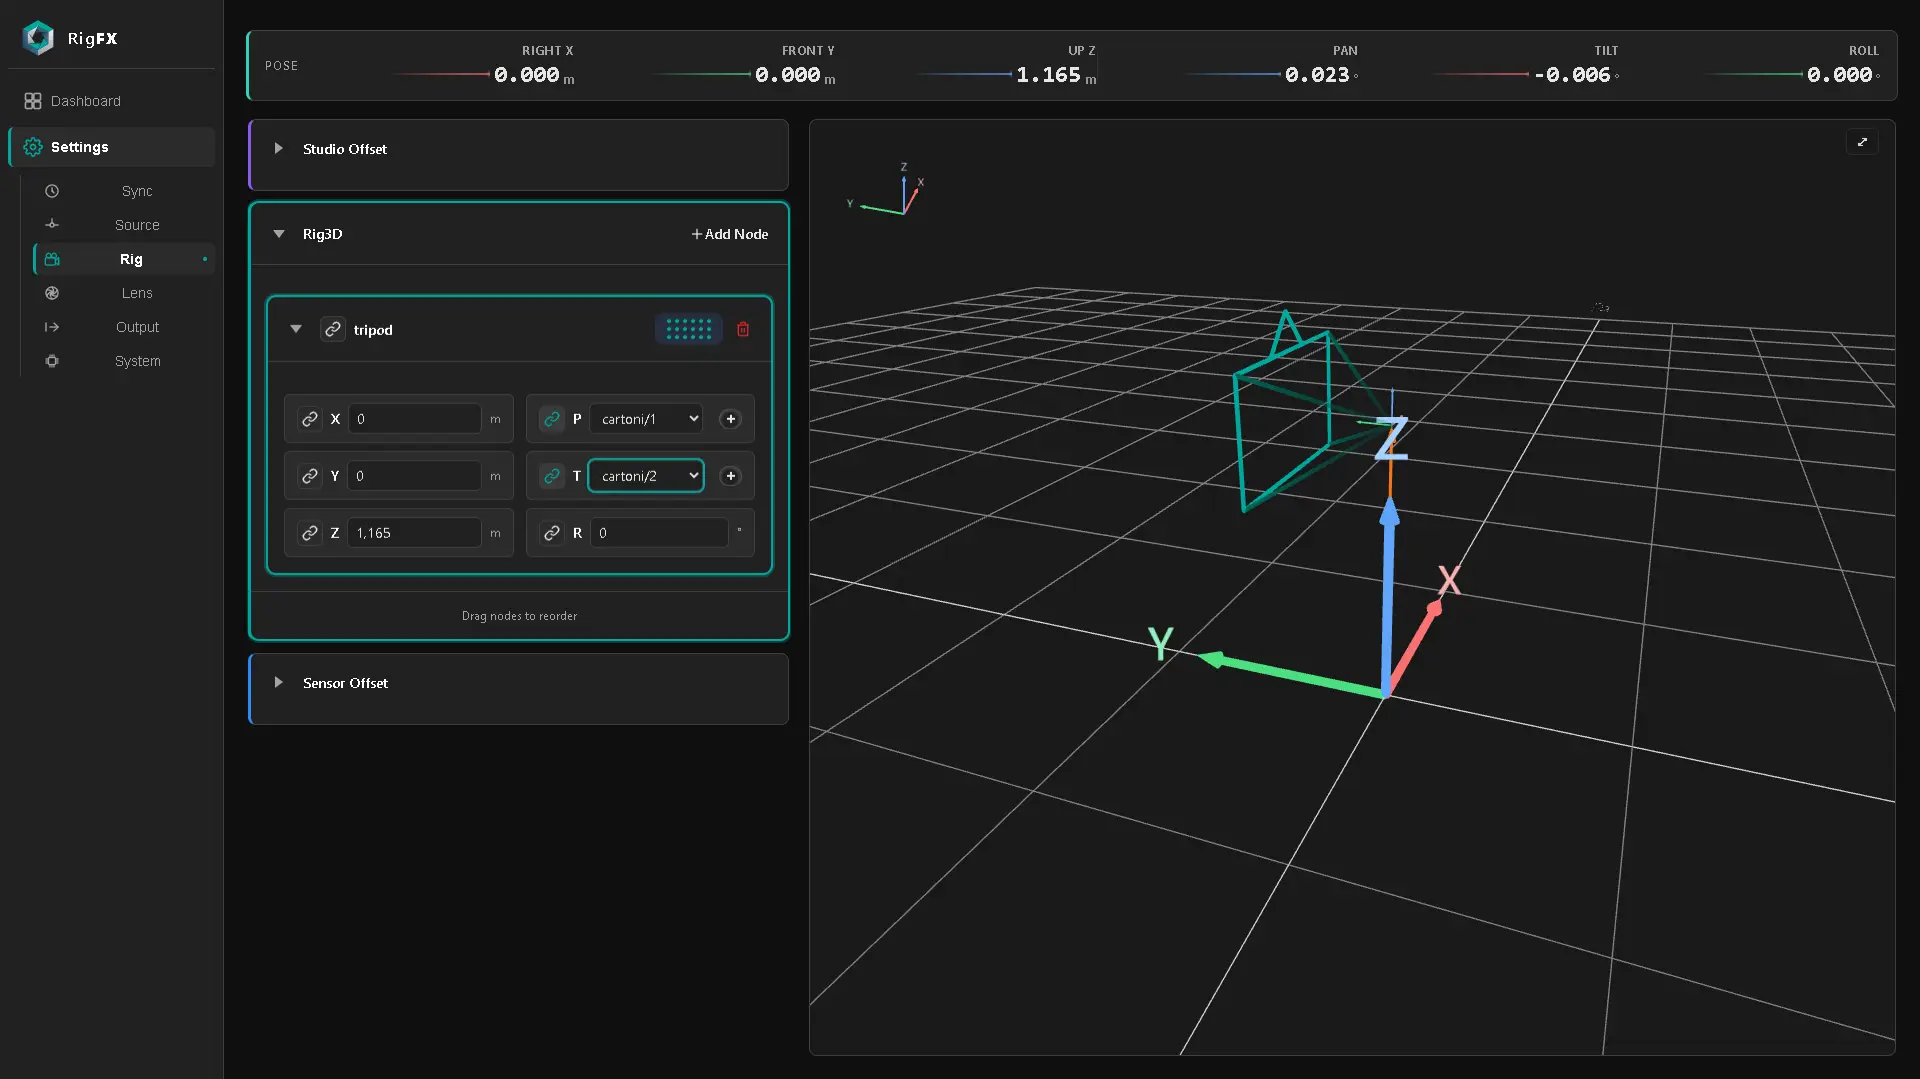
Arm
Head offset
FR7
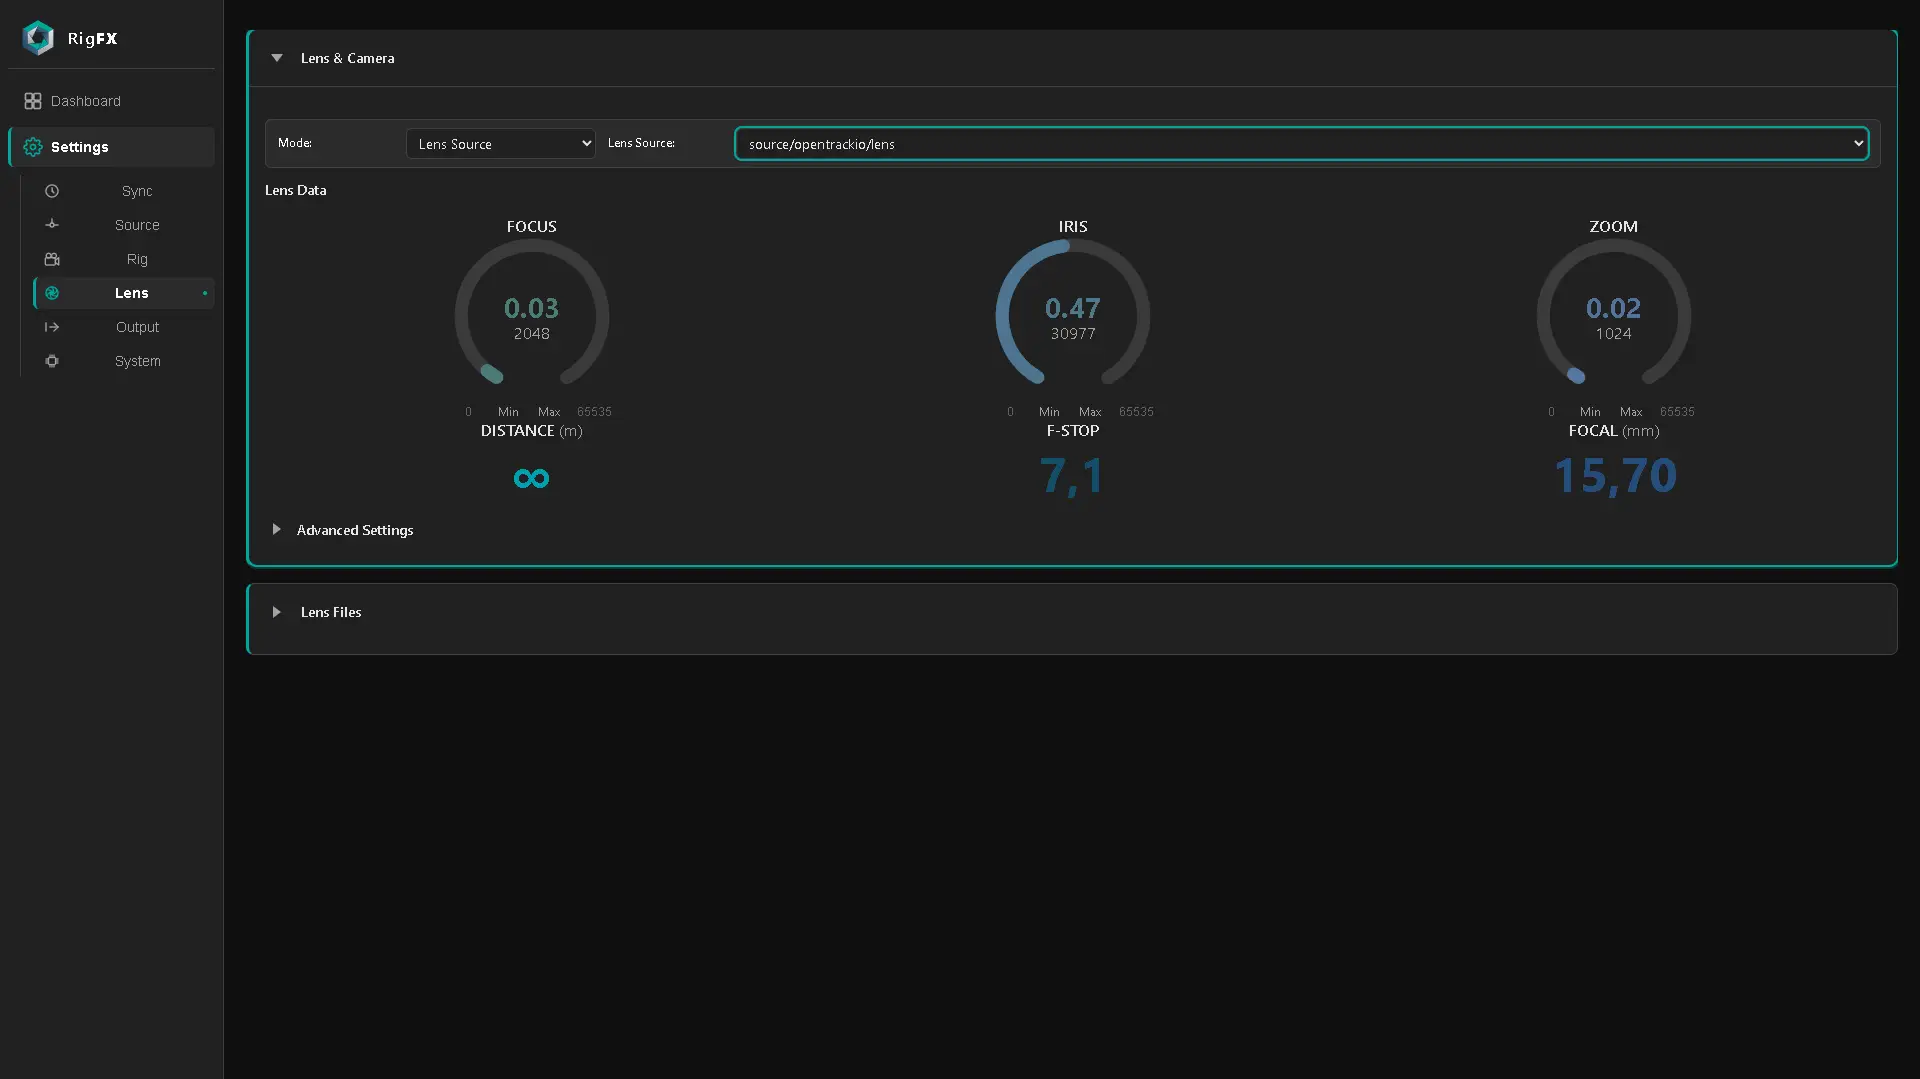
7. Lens
On RigFX
- go to Settings / Lens
- set mode to Lens Source
- set Source to OpenTrackIO
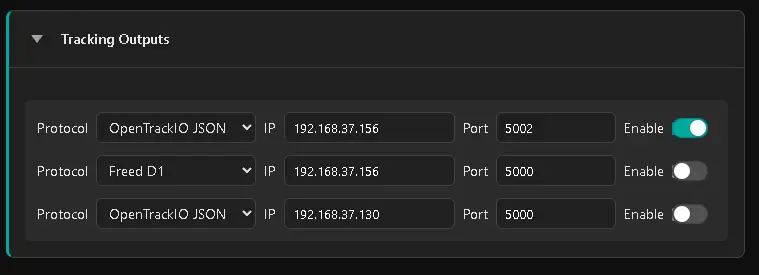
8. Output
On RigFX
- Go to Settings / Output
- set at least 1 target destination to Render Engine
- OpenTrackIO JSON
- set the target ip of the render computer
- set the port
- enable it